So on Saturday I was shopping in Boise. It was a lot of fun, partly because I love to shop and partly because I got to go with my aunts.
First off, my parents, Aunt Jewel (who's going to have a baby. YAY!) and I went to the Youth Ranch Distribution Center and got to get stuff by the pound. Which at first I wasn't sure if I should pick anything up but I eventually got over it and found a bunch of cute things. Then we met up with my Aunt Priscilla and Uncle Tom to have lunch. Mom and Dad picked up Emily and Grace from the hotel since Emily had stayed since she still wasn't feeling great, and I went with Jewel. We had Idaho Pizza, which isn't my favorite, but this time it was really good. We ended up talking so long that Grace fell asleep at the table. Then after that Jewel, Priscilla, my Mom and I went to Craft Warehouse.
IT WAS AWESOME!!!!!
No seriously, it was epic. The are like a crack dealer for the crafty people. They have all sorts of crafty things, projects and a plethora of other things.
Awesome. It was a lot of fun. They also have examples of neat crafts that other people have done. One of my favorites was the ones with melted crayons. Below is an example. I just thought that it looked really neat. All you have to do is have a canvas, crayons, glue (to hold the crayons), and a hairdryer (or, I have also heard that some people simply set them out in the sun.) But doesn't it look neat?
Anyway, there were a bunch of other crafty things. I also got this frog that "grows" in the water for my Sunday School kids. They're going to love it. It should grow to be about a foot tall or more. I have done some of the grow things before but they have generally been the tiny ones, so this one should be exciting.
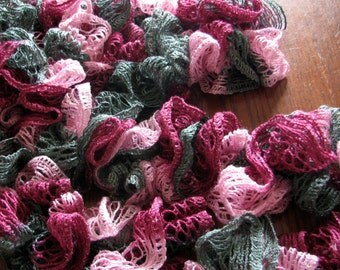
One of the other project examples they had was one of those "swirly" scarfs (see picture below). I have been wanting one for a long time, and I heard that they are fairly easy to make so I grabbed two skeins of yarn and decided that I was going to make myself one. I will post a picture of it when I get it finished. Super excited about that and I got some help from Emma, my friend, and I have one half way done and I've only been working on it for about a day. YAY! I can finally have my own swirly scarf!

Anyway, I have finished 3 out of my 4 finals and so I will be done with school soon. Yay! Then I can post a lot more on my blog here and do a lot more crafts.
P.S. So can't you see why Craft Warehouse is addicting???
Up, up and away craftsters.